


The Hole Battle
Surface preparation, proper tools solve the challenges drilling nonflat surfaces poses
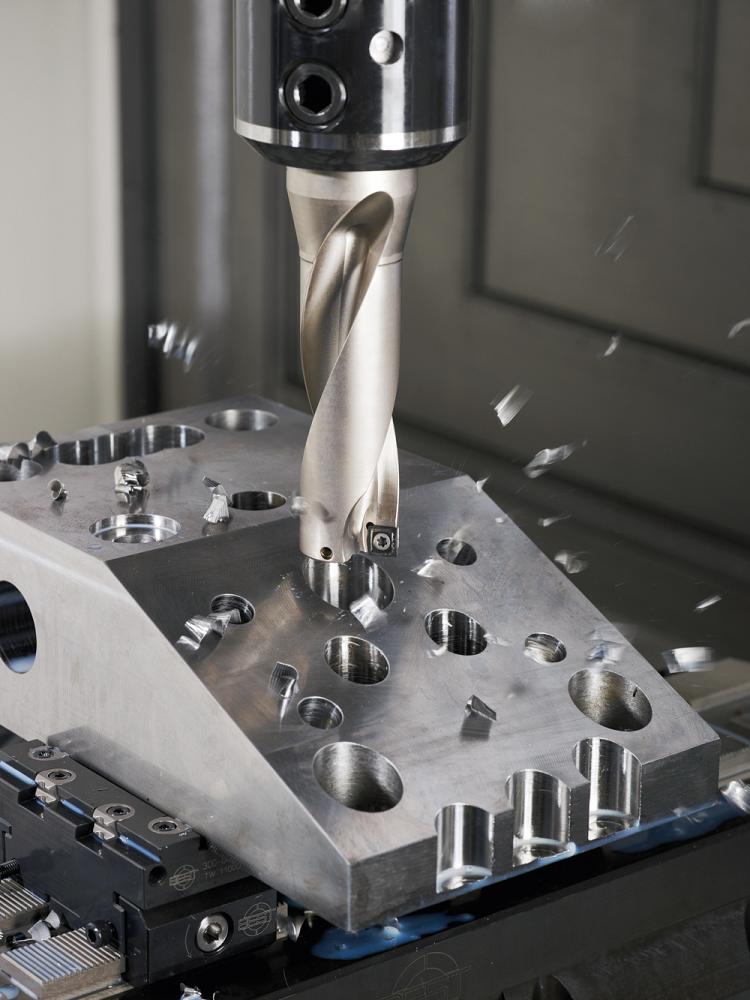
When drills are directed into an angled surface there is a tendency to push the drill point to one side, affecting its true position. Slowing the feed rate and speed of the drill can remedy this situation. Photo courtesy of Walter USA.
Among the processes a manufacturer uses to produce parts, putting holes into metal is one of the most basic.
Creating holes on flat metal is routine. Drilling holes into curved, nonflat, and uneven surfaces poses challenges, however.
Most drills have a point angle designed to help penetrate the material and soften the entrance of the tool into the cut.
“If the drill is going directly into a nonflat surface, this point angle could have a tendency to push the drill point to one side, affecting the true position of the hole location or possibly the straightness of the produced hole,” said Luke Pollock, product manager at Walter USA. “How far the drill can be pushed off-centre depends on the point angle, the severity of the nonflat surface, and the length-to-diameter ratio of the drill. A more stubby drill will be more rigid, making it more difficult to push the drill off-centre.”
Spot Drilling
One method to help the drill stay on-centre on uneven surfaces is to spot drill with a 180-degree-point pilot drill.
“The 180-degree-point [flat-bottom drill] will minimize the effect of the material trying to push the drill to one side. This will also create a nice flat surface for a longer drill with a point angle to then be used,” said Pollock. “If a 180-degree-point drill is not available, using a drill with the largest included point angle available is the best solution. Slowing both the feed rate and the speed (RPM) of the tool also will help mitigate the negative effects of drilling into uneven surfaces.”
Use a Mill
Taking a curved or uneven surface and milling it flat to accept the drill at a 90-degree angle is the preferred method, although this might involve more production work. Typically, drills like to start off on a flat surface, so when you have an angled surface or an irregular surface, you need to reduce the entry point or do a first operation like mill a flat on it first and then drill.
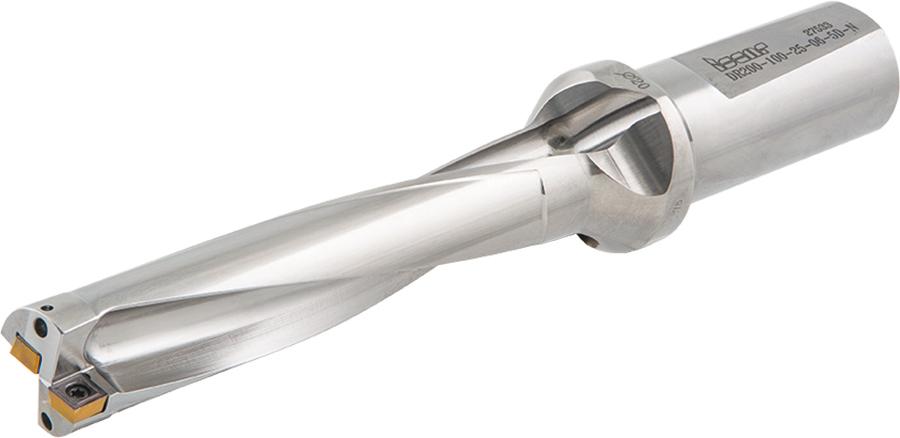
A twist drill can be an effective tool for uneven surfaces, especially when the feed is reduced when entering the cut. Photo courtesy of Iscar Tools.
“The irregular surface makes it deflect in different directions depending on the cutting forces,” said David Vetrecin, holemaking product manager at Iscar Tools Canada. “The best techniques are to mill a flat surface with an end mill or a fly cutter or pre-machine the area to be drilled. The second option is to have a very slow start with the drill until you can achieve a flat surface.”
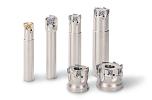
Upgrading from a solid-carbide drill to an indexable drill can, in most cases, remove the necessity of milling flat areas in uneven surfaces.
“A twist drill that has two inserts is more forgiving on irregular surfaces,” said Vetrecin. “The single effective flute design [of these tools has two inserts]. Essentially it is a centre-cutting boring bar, which is more forgiving on an irregular surface because you can reduce the feed. It will produce a flat by itself, and when you get to a full diameter of the drill, you can feed it at the proper rate.”
With carbide inserts fastened to the steel drill body, indexable drills usually have a step system that stabilizes the drill and keeps it on-centre when drilling nonflat surfaces.
“Indexable drills would be the most suitable for drilling on irregular surfaces. They are basically an unbalanced drill that has one insert for centre cutting and an outboard insert -- or peripheral insert -- for full size. It is more forgiving on an irregular surface than any drill design,” said Vetrecin.
Make an Exchange
Combining the benefits of solid grind-style drills and indexable drills, exchangeable-tip drills also are useful in one-step drilling of holes in nonflat surfaces. These drills have a single, interchangeable piece of carbide covering the entire drill point.
“The point geometry typically reflects that of a grind-style drill. However, the point is replaceable, which has more of the economic benefits of an indexable drill,” said Pollock. “One advantage over both other style of drills is that different diameters can be machined with one drill body. The drill body can accommodate drill points of various sizes. So just by changing the carbide drill point, hole sizes of different specifications can be machined.”
Most drill bodies for exchangeable-tip drills are designed to accept a range of sizes, and in essence, you can alter the size of the hole simply by replacing the carbide tip.
“It’s very easy to exchange the drill tip right on the machine. Normally, the tool has to be removed from the machine and another one used in its place while the task of replacing the carbide point takes place,” said Pollock. “With the exchangeable drill point, it’s possible that the machinist could replace the drill point right on the machine. There is very little downtime to do this, and an extra drill is not needed.”
For most operations, an indexable or exchangeable-tip drill works well on any surface.
“It is important to note, though, that indexable drills are primarily considered a roughing tool,” said Pollock. “Machining holes with particularly tight tolerances is not normally recommended. For high surface finish requirements or tight tolerances, a boring operation is recommended.”
While getting the drill to perform well when drilling a hole on an uneven surface is most of the battle, it is not the whole battle. Withdrawing the drill without damaging the hole is very important.
“It is possible to damage the surface quality of the hole during extraction in two ways,” said Pollock. “If the chips do not get properly extracted and are left in the hole, it’s possible to pinch or wedge a chip in between the drill and the part. This results in either the wall of the hole getting scratched or, in the worst-case scenario, breaking the drill.”
It’s a good idea to leave a small amount of spin (100 to 500 RPM) on the drill while extracting it. This will allow the helical flute to remove chips during extraction.
“The other problem that could exist is if the drill does not produce a straight hole,” said Pollock. “In this scenario, the drill will spring back to being straight once the cutting forces are removed. But if the hole is not straight, then one edge of the drill will drag back along the edge of the hole, causing marks on the side of the hole.”
The remedy in these situations is to ensure the correct cutting action occurs so that a straight hole is produced.
Although optimizing coolant usage and chip extraction are always important in any type of drilling, drilling in nonflat or uneven surfaces doesn’t pose any additional problems.
“Drilling into nonflat surfaces has its greatest difficulty while getting the point fully engaged into the cut,” explained Pollock. “Once the drill point is below the uneven surface, the challenges of this aspect are gone. Because of this, the effect of the coolant is very low. Either external or internal coolant should behave the same when working through a nonflat surface.”
Contributing writer Nestor Gula can be reached at nestor.gula@yahoo.ca.
Iscar Tools Canada, 905-829-9000, www.iscar.ca
Walter USA, 800-945-5554, www.walter-tools.com
About the Author
About the Publication

subscribe now

Keep up to date with the latest news, events, and technology for all things metal from our pair of monthly magazines written specifically for Canadian manufacturers!
Start Your Free Subscription- Stay connected from anywhere

Easily access valuable industry resources now with full access to the digital edition of Canadian Metalworking.

Easily access valuable industry resources now with full access to the digital edition of Canadian Fabricating & Welding.