


The keys to oxy-fuel safety
Safety in the welding shop is everyone’s responsibility.
Good oxy-fuel operators know that safety depends on proper and responsible use of oxy-fuel equipment. Safety has been a central principal at Victor for 100 years. In fact, one of its early innovations was a safer regulator because founder L.W. Stettner had lost an eye in an industrial accident and wanted to prevent that from happening to others. In that spirit, here are a few oxy-fuel safety tips that may prevent accidents from occurring in the first place:
Fire triangle:
The foundation for all oxy-fuel processes is the "Triangle of Combustion" or "Fire Triangle". Combustion requires three elements: fuel, oxygen and heat. Operators must control each of these elements, which is why safety starts with a clean work area, free from combustibles.
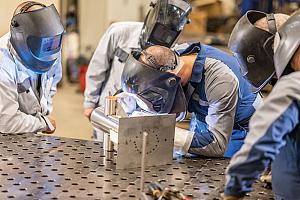
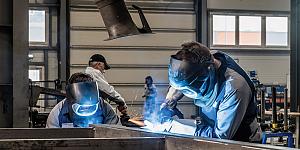
Oxy-fuel processes produce flames, sparks and a small amount of infrared rays. Eye protection options include a face shield, goggles or safety glasses, all with the appropriate shade lens. If operators use a face shield, they must also wear safety glasses underneath.
For operators that work in street clothes, choose tightly woven fabrics made from natural fibers. Wool is naturally flame retardant, and blue jeans, denim and cotton duck are also good choices. Wearing a lab coat or welding jacket (or at least sleeves) is a good idea; heavy-duty applications often require leather chaps and spats. Button shirt collars and sleeves, and don’t cuff pant legs, as they provide a perfect area to catch sparks and slag.
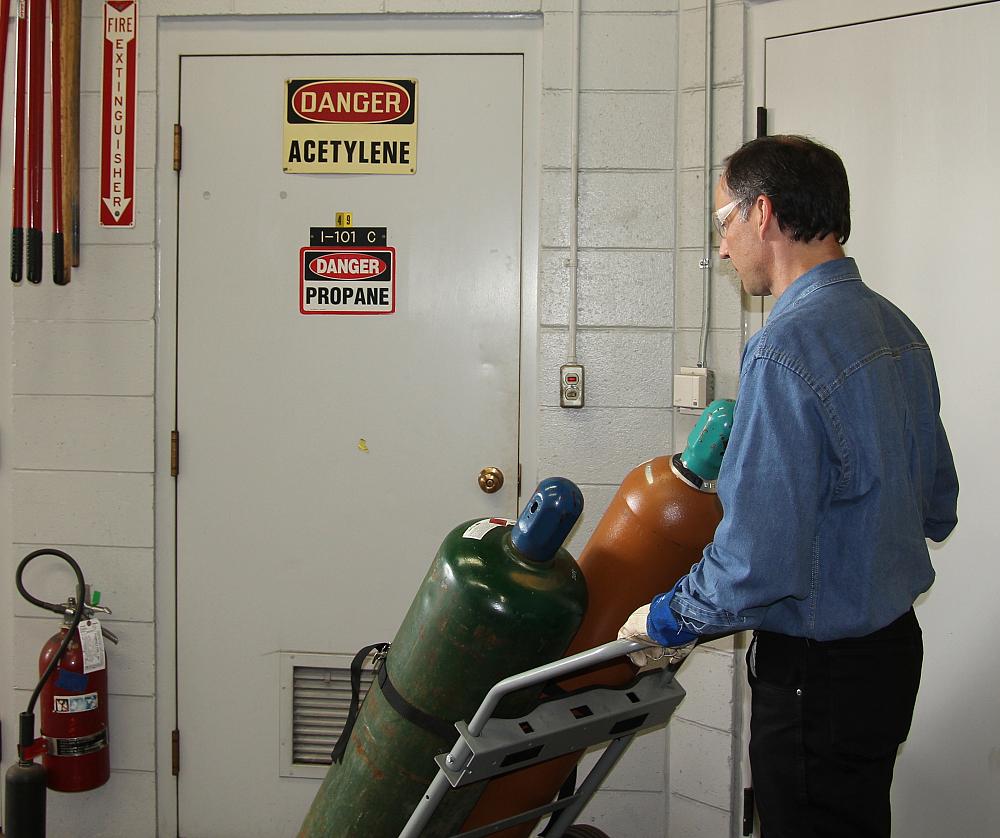
Cylinder identification and handling:
Operators commonly assume cylinder colour indicates a specific gas. Unfortunately, distributors and gas suppliers can paint their cylinders any colour they want. To identify a T cylinder’s contents, read the label. If a cylinder doesn’t have a label, don’t use it.
All cylinders have a United Nations (UN) gas identification marking on their label. Common ID numbers include UN 1072 for oxygen, UN 1001 for acetylene, UN 1978 for propane and UN 1077 for propylene.
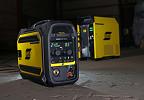
When moving cylinders, secure them with a strap or chain and install cylinder caps. Victor engineers understand that an improperly secured cylinder creates a hazardous situation. EDGE regulators feature SLAM (Shock Limitation and Absorp- tion Mechanism) technology. This three-stage “crumple zone” is built into the adjusting knob to help protect against serious cylinder damage in the event of a fall.
[gallery type="slideshow" ids="96179,96177,96173,96174,96176,96175"]
Gases in the work area:
Oxygen is the source for many gas-related accidents, and a primary culprit is using oxygen in place of compressed air, such as to blow dust off clothing or work areas.
The most widely used fuel gas is acetylene. Other fuels are commonly referred to as “alternate fuels.” These include LP gases (propane, propylene and butane) and compressed gases such as natural gas and methane.
Acetylene cylinders contain a porous mass saturated with liquid acetone. The acetylene gas is then pumped into the cylinder, absorbed into the acetone and released as it is used. Because of its nature, always use and store the acetylene cylinder in an upright position, and never use acetylene above 15 lbs. pressure. Acetylene has a tendency to disassociate above 15 PSI, which can cause a chemical reaction.
Acetylene withdraw rate is critical: never withdraw more than 1/7th of the cylinder volume per hour. For example, if a particular cylinder held 280 cubic feet, dividing that by 7 yields 40 usable cubic feet per hour of gas.
Equipment set-up - regulators:
Because different gases have different volume and pressure requirements, manufacturers engineer regulators for specific gases. Victor regulators are colour-coded and labeled for easy identification, such as green for oxygen and red for acetylene.
Pure oxygen can reduce the kindling temperature of petroleum-based lubricants to room temperature, leading to violent combustion. As such, the first safety check is to inspect regulator valves, threads and seats and ensure they are free of oil. Parts contaminated with oil or grease should be inspected and cleaned by qualified service personnel.
Equipment set-up - hoses:
There are three grades of hose. Use R and RM grade for acetylene. T grade hose may be used with any fuel gas and is the only grade allowable for alternate fuels. The acetylene hose, which is typically red, has a groove across one nut, which indicates a left-hand thread. The oxygen hose, which is typically green, will not have a groove, indicating that it’s a right-hand thread. Before attaching the hose, inspect it for oil, grease and cracks.
After attaching, remove potential contaminants by purging the hose. To purge a hose, adjust the regulator knob to about 5 PSI and allow gas to flow for a few seconds. Depending on the length of hose, that time may vary. Back out the adjusting knob after allowing adequate flow and repeat the process for the other hose.
Torch inspection:
Most torches come in two sections, the torch handle and various attachments for heating, cutting and welding. Before using an attachment, check its cone end and be sure the two O-rings are neither missing nor damaged. Repair them or replace them if necessary. On a cutting attachment, check the seating end for the tip. Dents or scratches here could lead to a leak and promote an accident.
Before connecting any attachment to the torch, inspect the seating area of the torch handle and the thread assembly. When attaching them, hand-tighten only. Using a wrench will damage the O-rings.
Next, inspect the cutting or heating tip to ensure the holes are free of debris. On a cutting tip, check the seating end for scratches or dents. To properly secure a cutting tip, which is a metal-to-metal seal, tighten it with a wrench. Before cutting, make sure the cutting oxygen lever moves freely.
Leak test:
After connecting the attachments and tips, operators need to check the entire system for leaks. The steps to perform a leak test are as follows:
Completely back out the regulator adjusting mechanism. Open the cylinder gas valve slowly until the high pressure gauge reading stabilizes, then shut off the cylinder valve. Monitor the gauge for any pressure drop, which would indicate a leak of the high pressure side of the system. If no leak is evident, open the cylinder valve and adjust the oxygen regulator to deliver 20 PSI.
Repeat the process with the fuel gas valve and regulator, but be sure to adjust the fuel gas regulator to deliver about 10 PSI. Close both the oxygen and fuel cylinder valves. Turn the adjusting screw or knob counterclockwise one-half turn. Observe the gauges on both regulators for a few minutes. If the gauge readings do not change, then the system is leak tight.
Open the cylinder valves again. Any movement of the needles indicates a possible leak. If a leak is observed, stop. Do not use leaking equipment. Check all the connections. If the leak can’t be found, have the equipment inspected by a qualified technician.
[gallery type="slideshow" ids="96183,96185,96184,96182,96180,96181,96178"]
Purging the torch:
Torches also need to be purged to eliminate the possibility of gases mixing prematurely, which could lead to a flashback, or worse. To start, open the oxygen valve on the torch handle all the way. With a cutting attachment, also open the preheat oxygen valve. Depress the cutting lever for three to five seconds. Shut the oxygen valves and repeat the process for the fuel side. This is also a good time to recheck the regulators to make sure they maintained set pressure.
Shut down:
Regardless of fuel gas used, always shut down the oxygen first and the fuel last. This technique leak checks both valves every time the torch is shut down. A snap or a pop indicates a leaking oxygen valve, while a small flame at the end of the tip indicates a fuel gas leak.
To shut down the entire system, start by closing both cylinder valves. Next, release the pressure inside the system by opening the oxygen valve on the torch until pressure decays; do the same with the fuel gas valve. Next, release the tension on the regulator by turning the knob or screws counterclockwise until they move freely. Check the regulators to be sure they indicate zero pressure in the system.
Always follow the proper shutdown procedures when finished cutting, even if it’s just for a lunch break. Never leave oxy-fuel systems pressurized while unattended. A leaking torch or hose could cause a pool of gas to build up (such as inside a barrel), creating a serious hazard.
Leader, participant guidelines:
By following these guidelines, operators minimize the possibility of an accident and make the environment safe for those around them. To support training efforts, Victor offers a DVD featuring a 36-minute Oxy-Fuel Safety Video in English or Spanish and extensive supplemental documents. These documents include checklists for many of the best practices discussed in this article, a 65-page Leader’s Guide on how to conduct a successful seminar and a Participant’s Guide with training materials and quizzes to assess knowledge absorption.
About the Author
About the Publication

subscribe now


Keep up to date with the latest news, events, and technology for all things metal from our pair of monthly magazines written specifically for Canadian manufacturers!
Start Your Free Subscription- Stay connected from anywhere

Easily access valuable industry resources now with full access to the digital edition of Canadian Metalworking.

Easily access valuable industry resources now with full access to the digital edition of Canadian Fabricating & Welding.
- Trending Articles
1
CWB Group launches full-cycle assessment and training program

2
Achieving success with mechanized plasma cutting

3
3D laser tube cutting system available in 3, 4, or 5 kW

4
Brushless copper tubing cutter adjusts to ODs up to 2-1/8 in.

5
Welding system features four advanced MIG/MAG WeldModes