Product manager, press brake tooling
- FMA
- The Fabricator
- FABTECH
- Canadian Metalworking
The rules of press brake tool selection, part I
- By Paul LeTang
- May 21, 2019
- Article
- Fabricating
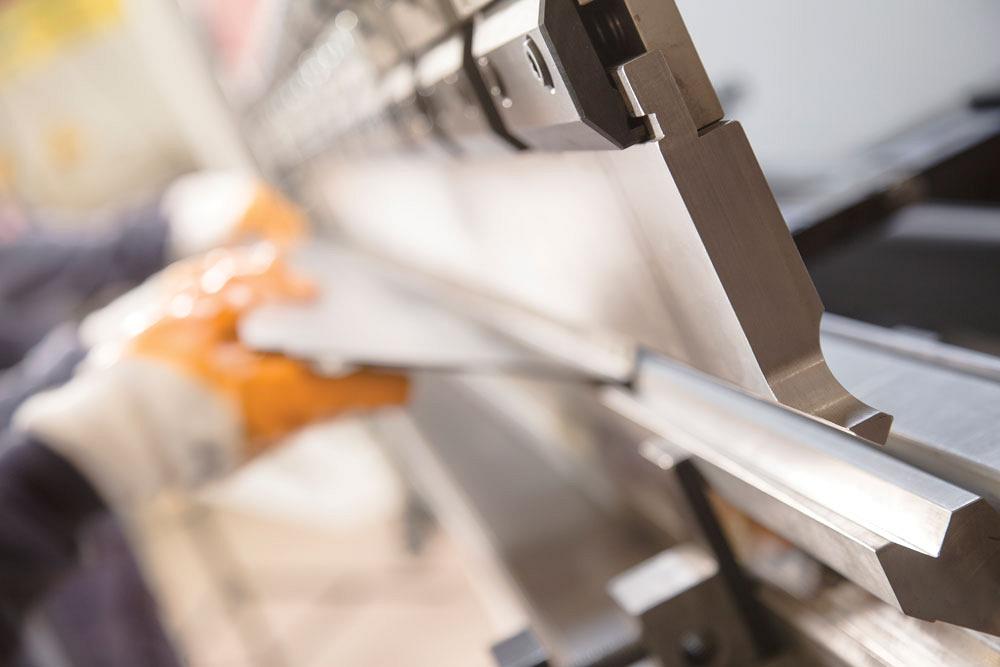
Many consider press brake tooling a minor accessory in metal forming when in fact the opposite is true. Although press brakes have evolved into multiaxes, high-precision machines with self-stabilizing features, the tooling is all that ever actually touches the part during bending (see Figure 1).
The line has blurred between RFA, New Standard, European, and American standard tooling. Many features needed for high-performance bending have migrated to all the various tooling types. Regardless of which tooling and clamping style you choose, be sure it meets at least a few minimum requirements.
High precision. The tools should be manufactured to tolerances within the 0.0004-inch range. This is critical to achieve part accuracy without shimming or other tweaks during setup.
Segmented sections. These allow you to build various lengths out of several precut pieces. Small pieces are safer and easier to handle too.
Self-retaining installation. You should be able to load the tools with the ram up. The toolholding system should hold multiple pieces in place until the clamping pressure is applied (see Figure 2).
Self-seating. As clamping pressure is applied, the punches are mechanically pulled up into position. This eliminates the need to bottom the punch into the die during the setup.
Front loading. You should be able to install tools from the front of the machine. This shortens setup time because you no longer need to spend time sliding tools from the end of the press brake. In most cases, front loading also eliminates the need for forklifts and overhead cranes.
Standard sizes. Common-height tools can reduce the need for machine adjustments when changing jobs. Front support arms, backgauge heights, and safety devices all remain at a common position. And because tools are made to the same heights, you can add off-the-shelf pieces and be sure they will match your existing tools.
Many high-quality press brake tools are made to metric standards. So a nominal sized 0.250-in. V opening is actually 6 mm, or 0.236 in. Moreover, bends in sheet metal have slightly elliptical corner radii, so you only have to get close to get correct. For simplicity, imperial dimensions are rounded in this article.
Note that the discussion that follows focuses on air bending, and for good reason. The trend is to abandon bottoming or coining and embrace air bending whenever possible. Be aware, however, that not all parts can be produced using classic air bending techniques.
Operators throughout the industry use very different tooling to make parts of similar or identical quality. Plenty of operators make acceptable parts with incorrect tooling because they don’t have access to the correct tooling. They make it work; but “making it work” isn’t efficient or repeatable, and it can seriously hinder work flow. Best practices in tooling selection really should have one elegantly simple goal: to achieve the best-quality parts in the least amount of time possible.
What Tools Do You Need and Why?
A maintenance shop will need and use different press brake tools than a custom fabricator will. So before diving into specifics, identify your needs and budgetary constraints.
For instance, you might need additional tools to shorten setup times. You might follow lean manufacturing principles and recognize the benefits of having a separate tool library for each press brake—and hence, be willing to invest in duplicate sets of tools stored at machines. You don’t lose valuable setup time walking to and from the tool crib and elsewhere looking for the correct tools. An added benefit here is that tool style compatibility from machine to machine is no longer necessary, because the tools tend to stay with their intended machine (see Figure 3).
If you need to buy additional, duplicate tools to expand each brake’s dedicated tool crib, choosing them is relatively straightforward. You’ll often find these tools located in convenient places, if not already in the press brakes. Look for the tools with the most wear and tear—those with shiny, bright working surfaces. The body of the tools will likely be clean and bright too. Rusty, dirty tools on the bottom of the rack are not likely candidates.
Die Selection
To get the biggest bang for your buck, choose a minimum number of lower dies that will cover the entire range of metal thicknesses your shop forms. Shops with little tribal knowledge, unforeseen applications, and limited budgets should try selecting lower dies using the 8×2 rule.
First, determine the range of metal thicknesses you want to bend. For example, you might need to bend material 0.030 in. through 0.250 in thick.
Second, assess the smallest V die needed by multiplying the thinnest metal by 8. In this case, 0.30-in. material would need the smallest die, hence: 0.030 × 8 = 0.24, which we’ll round up to 0.25.
Third, assess the largest V die needed by multiplying the thickest metal by 8. In this case, the thickest material of 0.250 in. would need the largest die: 0.250 × 8 = 2.
You’ve now determined the smallest and largest die you need—0.25 and 2 in. To fill in what you need in between, you start with the smallest V die and double its size. In this case, that gives you a 0.5-in. die (0.25 × 2 = 0.5). Next, double the 0.5-in. die to get 1.0-in, then double that to get 2.0 in. This gives you a minimum of four different V-die openings to bend 0.030- to 0.250-in. material: 0.25, 0.5, 1.0, and 2.0 in.
Punch Selection
You also use material thickness to determine the minimum number of upper punches. For material 0.187 in. and thinner, you can use an acute offset knife punch with a 0.04-in. radius. The acute angle allows bending past 90 degrees, and the offset allows you to form J shapes. To handle the higher forces when forming material between 0.187 and 0.5 in. thick, consider a straight punch with about a 0.120-in. radius.
Note that for some applications, including those using thicker and high-tensile material, the workpiece tends to crease, crack, or even split in two when using common industry bending standards. It comes down to physics. A narrow punch tip exerts more force on the bend line; combine that with a narrow V-die opening, and the forces rise even more. For challenging applications, and especially when material thicknesses are above 0.5 in., it is best to consult your material supplier on the recommended punch tip radius.
The Rule of 8
In a perfect world, you should be able to select the V-die opening using what we call the Rule of 8; that is, the V-die opening should be 8 times the material thickness. To determine this, multiply the material thickness by 8 and choose the closest available die. So if you have 0.060-in.-thick material, you need a die that’s 0.5 in. (0.060 × 8 = 0.48; 0.50 in. is the closest die width); for 0.125-in. material, you need a 1-in. die (0.125 × 8 = 1). This ratio gives the best angular performance, which is why many call it the “sweet spot” for V-die selection. Most published bending charts are centred around this formula.
Simple enough? Well, it would be in that perfect world, and you could live in that perfect world if the sheet metal designers always followed the rule of 8. But alas, in the real world, the exceptions abound.
V-die Opening Determines the Radius
When air bending mild steel, the inside bend radius forms at approximately 16 per cent of the V-die opening. So if you air-bend material over a 1-in. V die, your inside bend radius will be about 0.16 in.
Say a print specifies 0.125-in. material. In a perfect world, you’d multiply that thickness by 8 and use a 1-in. V die. Simple enough. But many sheet metal designers like to specify a bend radius equal to the metal thickness. What if the print specifies an inside radius of 0.125 in.?
Again, material air-bends an inside radius that’s about 16 per cent of the die opening. This means your 1-in. die can produce a radius of 0.160 in. Now what? Just use a narrower V die. A 0.75-in. die will give you an inside radius that will be close to 0.125 in. (0.75 × 0.16 = 0.12).
Similar thinking applies for prints that specify larger bend radii. Say you need to form 0.125-in.-thick mild steel to a 0.320-in. inside bend radius—more than double the material thickness. In this case, you’d choose a 2-in. die, which would produce an inside bend radius of about 0.320 in. (2 × 0.16).
There are limits to this. For instance, if you find that to achieve the specified inside bend radius you need a V-die opening that’s less than five times the metal thickness, you will compromise angular accuracy, possibly damage the machine and its tooling, and put yourself in a very unsafe situation.
Minimum Flange Length
Keep flange lengths in mind when choosing your V dies. The minimum flange a given V die can form is approximately 77 per cent of its opening. So a part being formed over a 1.-in. V die will need at least a 0.77-in. flange.
Many sheet metal designers like to save metal and specify a flange that’s too short, like a 0.5-in. flange in 0.125-in. material thickness (see Figure 4). According to the rule of 8, 0.125-in.-thick material calls for a 1-in. V die—but that 1-in. V die requires the workpiece to have a flange that’s at least 0.77 in. Now what? Again, you can use a narrower V die. For instance, a 0.625-in. die can form parts with flanges as short as 0.5 in. (0.625 × 0.77 = 0.48, rounding up to 0.5).
This also has limits. Just as with tight inside bend radii, if a flange requires a die width that’s less than five times the material thickness, you’ll experience angular accuracy issues, cause possible damage to the machine and its tooling, and put yourself in harm’s way.
Paul LeTang is product manager, press brake/tooling at Bystronic Inc., 200 Airport Road, Elgin, Ill. 60123, 800-247-3332, www.bystronicusa.com
Check out the second part of rules of press brake selection with details on punch selection rules, offset rules, and bending across cutouts and mitres, among other topics.
About the Author
subscribe now


Keep up to date with the latest news, events, and technology for all things metal from our pair of monthly magazines written specifically for Canadian manufacturers!
Start Your Free Subscription- Industry Events
MME Saskatoon
- May 28, 2024
- Saskatoon, SK Canada
CME's Health & Safety Symposium for Manufacturers
- May 29, 2024
- Mississauga, ON Canada
DiPaolo Machine Tools Open House 2024
- June 4 - 5, 2024
- Mississauga, ON Canada
FABTECH Canada
- June 11 - 13, 2024
- Toronto, ON Canada
Zoller Open House & Technology Days 2024
- June 12 - 13, 2024
- Ann Arbor, MI


