

Associate Editor
People usually buy stainless steel pre-finished, which adds complexities when working with the material that the operator must consider.
Like most materials, stainless steel offers many advantages and disadvantages. Steel is considered “stainless” if the alloy contains at least 10.5 per cent chromium, which creates an oxide layer that provides it with acid and corrosion resistance. This corrosion resistance can be increased further by raising the chromium content and adding additional alloying agents.
The material’s “stainless” property, low maintenance, durability, and various surface finishes make it suited for industries such as architecture, furniture, food and beverage, medical, and many other applications where both the strength of steel and corrosion resistance are required.
Stainless steel tends to be more expensive than other steel options. However, it offers a strength-to-weight advantage, allowing it to be used with a reduced material thickness compared to conventional grades, which can lead to cost savings. Because of its overall cost, shops need to ensure that they are working with the right tools to avoid costly waste and rework of this material.
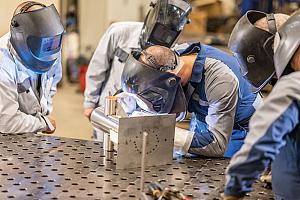
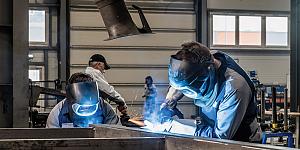
Stainless steel often is seen as difficult to weld because of its fast dissipation of heat and the significant care it requires in the final finishing and polishing stage.
Working with stainless usually requires a more veteran welder or operator than one working with carbon steel, which tends to be more resilient. It can to be less forgiving when introduced to certain parameters, especially in the welding process. Because of the high cost of stainless steel, it makes sense for a more experienced operator to work with it.
“People usually buy stainless steel because of its finishes,” said Jonathan Douville, senior product manager, R&D International, Walter Surface Technologies, Pointe-Claire, Que. “This adds a constraint that the operator must consider.”
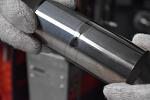
Whether it’s a No. 4 linearly textured finish or a No. 8 mirror finish, the operator must be sure to respect the material and not damage the finish during handling and processing. This can also limit the options for prepping and cleaning, which are essential to ensuring good part production.
“When working with this material, one of the first things to ensure is that it is clean, clean, clean,” said Rick Hatelt, Ontario territory manager, PFERD Canada, Mississauga, Ont. “Ensuring you have a clean (carbon-free) atmosphere is very important, as is cleaning of the stainless steel to remove impurities that may cause oxidation (rust) later and prohibit the rebuilding of the passive layer, which creates the protective layer to minimize oxidation.”
When working with stainless it is essential that the material and surrounding environment be clean. Removing the oils and plastic residue from the material is a good place to start. Contaminants on the stainless can lead to oxidization, but they also present a problem during the welding process, potentially causing defects. So it is important to clean the surface before starting to weld.
Shop environments are not always the cleanest, and cross-contamination can be problematic when working with both stainless steel and carbon steels. Often, a shop will have a number of fans running or an air conditioner to cool down workers, which can push contaminants across the floor or cause condensation to drip or build up on raw material. This is particularly challenging when carbon steel particles are blown onto stainless. Keeping these materials separate and in a clean environment will make all the difference when it comes to effective welding.
It’s important to get rid of the discolouration to ensure that rust doesn’t build up over time and weaken the overall structure. It’s also nice to remove the bluing to make the surface uniform in colour.
In Canada, with the extreme cold and winter weather, it is important to choose the right grade of stainless steel. Douville explained that most shops initially go with 304 because of its price. But if a shop will be working with the material outside, he would recommends using 316 instead, even though it is double the price. 304 tends to corrode if used or stored outside. Even if the surface is cleaned and the passive layer is built up, the outdoor conditions will affect the surface and eat away at the passive layer, eventually causing it to rust again.
“There are many basic reasons why pre-weld prep is important,” said Gabi Miholics, application development specialist, abrasive systems division, 3M Canada Company, London, Ont. “Removing rust, paint, and bevelling is necessary for proper welding to occur. There can be no contaminants on the weld surface which may weaken the bond.”
Hatelt added that cleaning up the area is essential, but pre-weld prep can also include chamfering the material to ensure proper weld adhesion and strength.
For welding of stainless, it is important to choose the right filler metal for the grade being used. Stainless is particularly sensitive and requires the weld be certified with the same type of material. For example, 316 base metal requires a 316 filler metal. A welder cannot just use any type of filler metal, each stainless grade requires a specific filler for a proper weld to occur.
“When welding stainless, the welder really has to watch the temperature,” said Michael Radaelli, product manager, Norton|Saint-Gobain Abrasives, Worcester, Mass. “There are a lot of different devices available to measure temperature as the welder is heating up the weld and the part, because if a crack occurs in the stainless, the part is basically ruined.”
Radaelli added that the welder needs to make sure that he is not staying on the same section for prolonged periods. Multilayer welding is a good way to prevent overheating of the base material. Prolonged welding on the base stainless will cause it to overheat and crack.
“Welding with stainless steel can be more time-consuming, but it’s also an art, requiring an experienced hand,” said Radaelli.
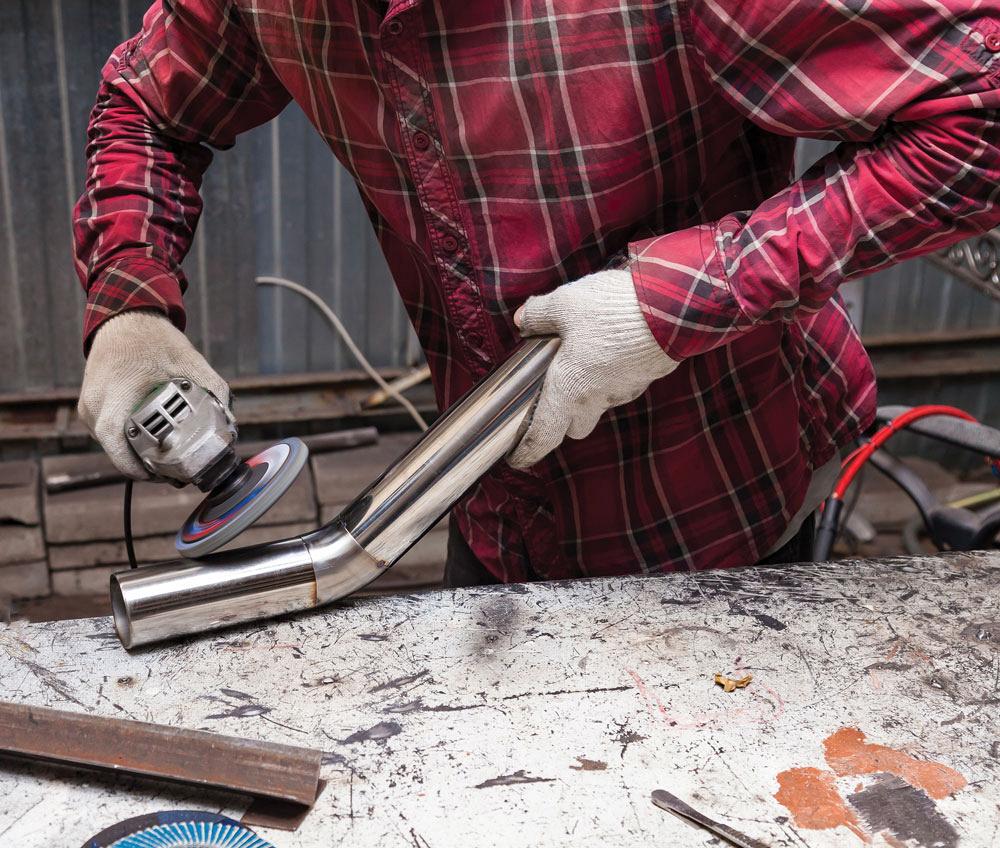
Post-weld prep really depends on the end product and its application. Miholics explained that in some situations a weld seam will never really be looked at, so only limited cleanup of the post-weld is required with a quick removal of any significant spatter. Or a weld may need to be levelled out or cleaned up, but not require a specific finish. If a fine or mirror finish is needed, more exhaustive finishing steps may be required. It just depends on the application.
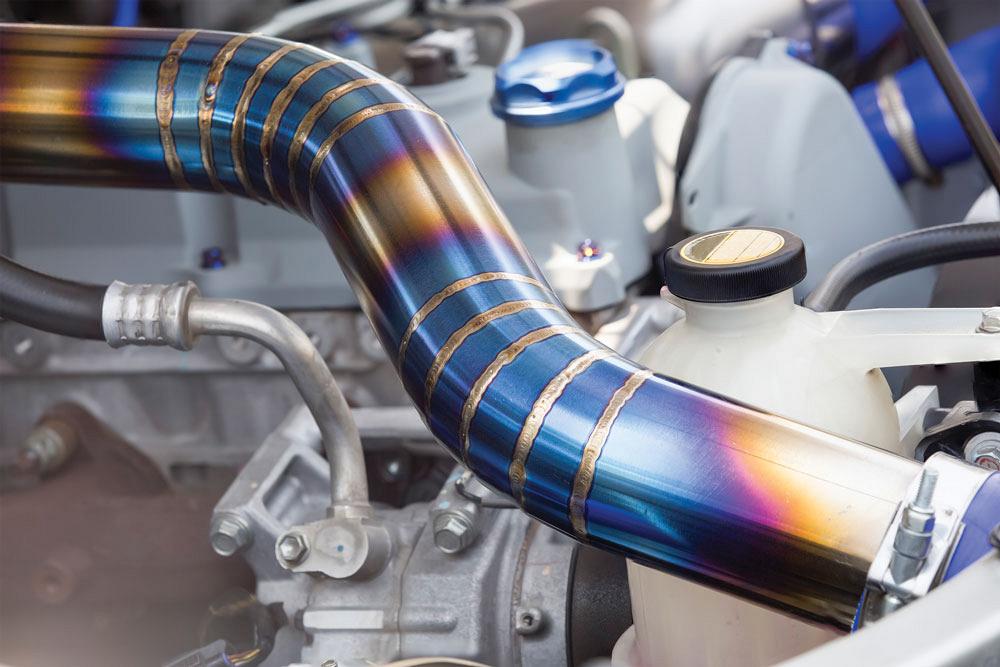
One common issue that operators need to be aware of is the bluing of the material.
“It’s not so much the colour that’s the problem,” said Miholics. “This surface discolouration indicates that the metal properties have changed and is now open for oxidation/rusting.”
Choosing a variable-speed finishing tool will save time and money and allow the operator to match the finish.
It’s important to get rid of the discolouration to ensure that rust doesn’t build up over time and weaken the overall structure. It’s also nice to remove the bluing to make the surface uniform in colour.
The cleaning process can damage the surface, especially if it’s done using harsh chemicals. Improper cleaning prevents the passive layer from forming. This is why many of the experts recommend manual cleaning of these welded components.
“When doing manual cleaning, if you don't let the oxygen react with the surface for 24 or 48 hours, then you won't have time to build that passive surface,” said Douville. He explained that the surface needs oxygen to react with the chrome in the alloy to build that passive layer. Some shops tend to clean, wrap the part, and ship it right away, which slows down this process and opens up the risk for corrosion.
It is common for fabricators and welders to work with a range of materials. However, as previously mentioned, working with stainless adds some constraints. Taking the time to clean the part is a good first step, but this is only as good as the environment it’s done in.
Hatelt said that he sees contaminated work areas all the time. Eliminating the presence of carbon in the stainless work environment is key. It is common for shops that are working with steel to move into stainless without properly preparing the work environment for this material. This is a mistake, especially if they are unable to keep the two materials separate or purchase each its own set of tools.
“If you have a wire brush that is being used to grind or prep stainless, then use it on carbon steel, you can't go back to the stainless steel,” said Radaelli. “The brush in now contaminated with the carbon and will cause rust. The brush cannot be cleaned once it has been cross-contaminated.”
Hatelt said that shops should use separate tools for material prep, but they should also label tools with “stainless only” to avoid unnecessary contamination.
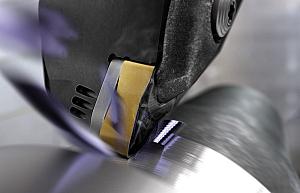
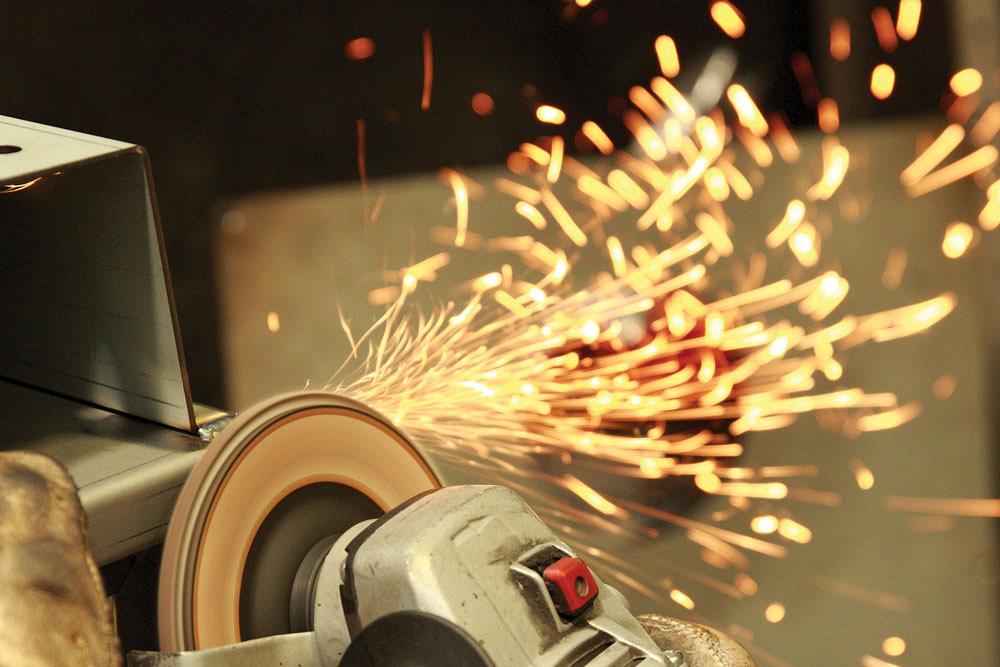
Shops should take many factors into account when choosing tools for weld prep of stainless, including heat-dissipating options, mineral type, speed, and grit size.
“Choosing an abrasive that has a heat-dissipating coating is a great start,” said Miholics. “Stainless is so hard that it generates a significant amount of heat, more than mild steels, when grinding. The heat has to go somewhere, so having a coating that allows the heat to flow to the edge of the disc and not sit right at that point where you're grinding is ideal.”
She added that choosing an abrasive can also depend on what the overall finish should look like. It’s really in the eye of the beholder. An aluminum oxide mineral in abrasives is by far the most common type used in the finishing steps. To make that stainless steel look blue on the surface, a silicon carbide mineral should be used. It’s sharper and will leave deeper cuts that reflect the light differently, giving it that blue colour. It is good to speak with the supplier if the operator is looking for a specific or unique surface finish.
“RPM is a big issue,” said Hatelt. “Different tools require different RPM and usually they are run much too fast. Using the correct RPM ensures the best outcome, be it speed of getting the job done and achieving the required finish. Know the finish that is required and how it is measured.”
Investing in a variable-speed finishing tool is one way to overcome speed issues, added Douville. Many operators attempt to use a regular grinder to do finishing, but it has only one high speed made for cutting. The speed needs to be slowed for the finishing process. Choosing a variable-speed finishing tool will save time and money and allow the operator to match the finish.
Also, when choosing an abrasive, the grit is important. The operator should start with the finest grit possible for the application.
Starting off with a 60 or 80 (medium) grit, the operator can almost immediately jump to a 120 (fine) grit and move into a 220 (very fine) grit that will bring the stainless steel up to a No. 4 finish.
“It can be as simple as three steps,” said Radaelli. “However, if the operator is working with a large weld, he can’t start with a 60 or 80 grit, and may opt for a 24 (very coarse) or 36 (coarse) grit. This adds extra steps and may put a deep scratch into the material that can be hard to get out.”
Also, adding an antispatter spray or gel can be a welder’s best friend, said Douville, but it’s often something that is overlooked when welding stainless steel. Having a part with spatter requires it to be removed, and that may scratch the surface, requiring extra grinding steps and more time wasted. Using an antispatter system can eliminate this step with ease.
Associate Editor Lindsay Luminoso can be reached at lluminoso@canadianfabweld.com.
3M, www.3m.com
Norton|Saint-Gobain, www.nortonabrasives.com
PFERD, www.pferdcanada.ca
Walter Surface Technologies, www.walter.com

Keep up to date with the latest news, events, and technology for all things metal from our pair of monthly magazines written specifically for Canadian manufacturers!
Start Your Free Subscription
Easily access valuable industry resources now with full access to the digital edition of Canadian Metalworking.
Easily access valuable industry resources now with full access to the digital edition of Canadian Fabricating & Welding.