


Associate Editor
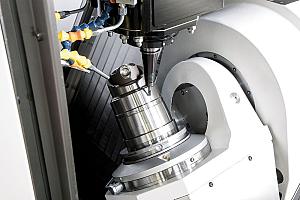
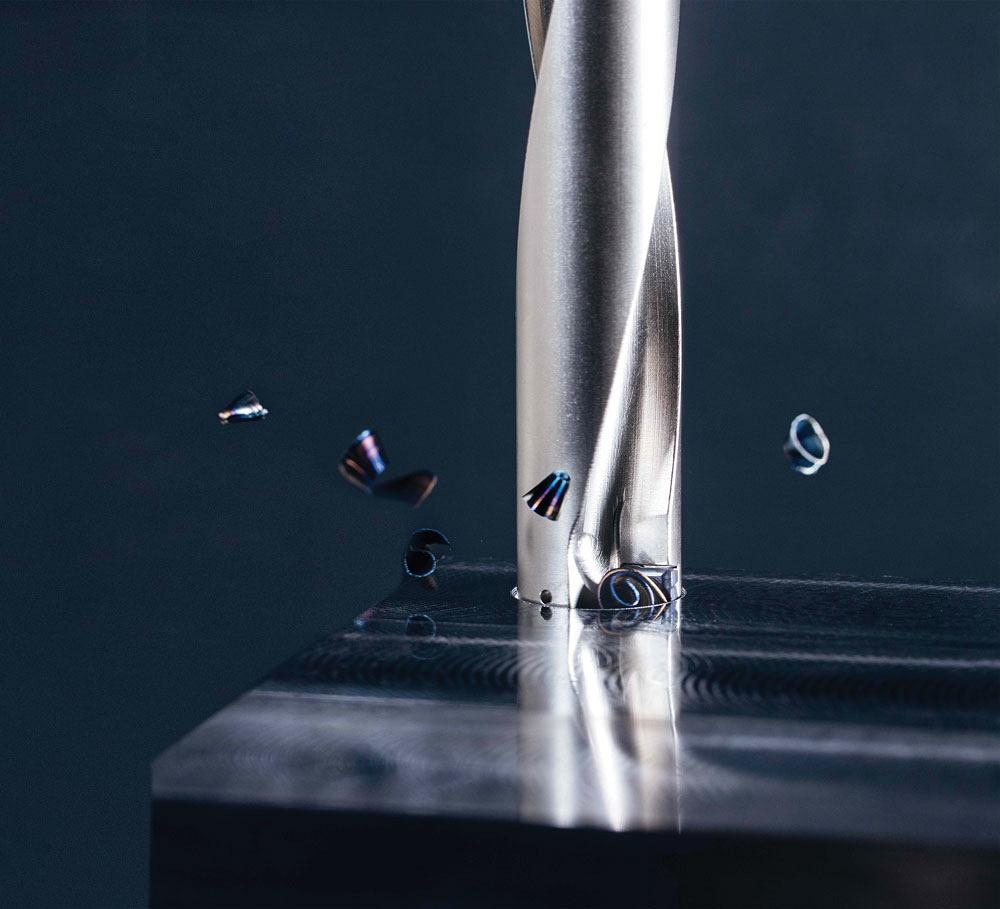
An advantage of going with an exchangeable-tip modular drill is that it is double effective, and the way it drives can hold a better tolerance. YG-1
Those shops needing to produce 1- to 2-in.-dia. holes have many factors to consider. And if they have to meet high surface finish requirements and tight tolerances, there are added concerns.
Drilling is by far one of the fastest ways to remove material. And you especially cannot beat the speed that drilling offers when producing larger-diameter holes, such as 1 to 2 in.
"While there are a couple of options to producing this type of hole, we always recommend drilling," said Manfred Lenz, product manager, holemaking, Seco Tools, Troy, Mich. "Another option is high-feed milling. This process takes a very shallow depth of cut. It circular-interpolates with a certain ramp angle to remove the material. But even still, a drill is just that much faster."
But what type of drill makes the most sense for this application?
The biggest consideration is selecting a drill type that can produce the type of holes needed and can be run properly.
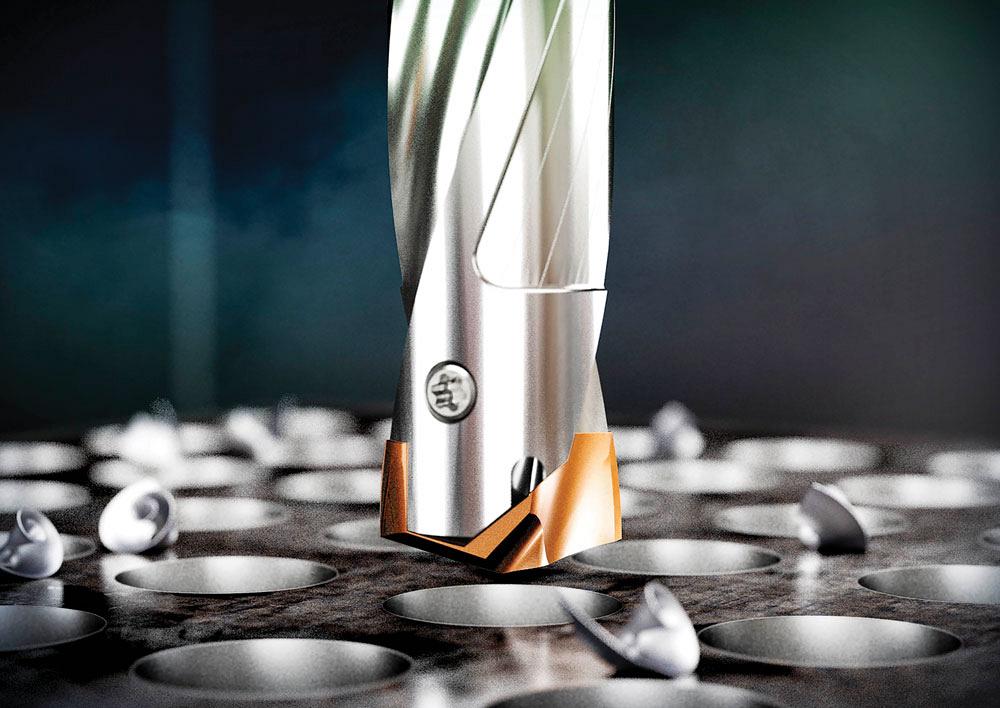
"There are many types of drills available," said Patrick Maigatter, product manager, cutting tools—holemaking, CERATIZIT, Schaumburg, Ill. "For example, spade drills, solid-carbide drills, indexable drills with inserts only, and indexable drills that have both inserts and a centre drill to help guide it in the hole all have pluses and minuses. The key is to select the best tool for your application that will produce a quality hole in an acceptable amount of time. Generally speaking, it depends on the application and the requirement of the part, but I would recommend an indexable insert drill. These will usually provide the best balance of quality and productivity."
At this size range, solid carbide is definitely not an option, and even if it was, the cost would be outrageous. It’s important to keep in mind that a drill is a roughing tool. Most indexable drills can hold a tolerance of IT12, which is fairly wide.
"A strong drill body will improve surface finish," said Lenz. "But the design of the drill can also impact quality. When drilling, the bottom of the drill, where the inserts are located, is always flexing like it wants to almost unwind the helix angle or the flutes. The harder you push the drill with more feed rate, the more it wants to unwind. And that’s why sometimes you get a little bit of vibration or noise. A strong drill designed to counter this unwinding action can eliminate surface finish issues."
Beyond that, it’s important to choose a drill with the shortest length possible. The larger the length-to-diameter ratio, the more challenging it is to achieve surface finish requirements. For example, Lenz noted that surface finish gets worse even from a 2xD to a 5xD drill. It’s important to keep the drill short, and the same goes for the toolholder.
"For a 1- to 2-in.-dia. hole, an exchangeable-tip modular drill is a good choice," said Steve Pilger, NA product manager, holemaking, YG-1 USA, Vernon Hills, Ill. "Essentially, this is a steel body with a proprietary connection to a carbide insert that’s double effective. These drills offer more flexibility, but you do give up some rigidity and can tend to have more open tolerances."
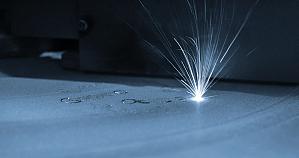
A good rule of thumb when it comes to drilling into interruptions, cross holes, or uneven surfaces is to reduce the feed rate by 50 per cent and ramp it back up once it has full engagement. Seco Tools
For Pilger, the advantage of going with an exchangeable-tip modular drill is that it is double effective, whereas an indexable drill is single effective, meaning that all the cutting is done on one edge instead of two.
"Another advantage is that a standard exchangeable-tip modular drill can run effectively up to 12xD," said Pilger. "With a typical indexable, it really only goes up to around 8xD, but even with that, the higher up you go, the larger the diameter tolerances you can expect. An 8xD indexable drill might have a tolerance of 0.015 in. on diameter, which is huge, whereas with an exchangeable-tip, you could probably get closer to a 0.005-in. range. The self-centring point holds a closer tolerance."
Pilger added that the advantage of an indexable or an inserted drill is that it’s very low cost. These drills have three or four corners to work with, and by just turning an insert, you get a lot of use out of it. Inserts are fairly inexpensive compared to exchangeable tips.
It’s always best to enter a hole on a flat, clean surface. Ridges, tilt, or angle to the surface can make entering a hole more difficult. Making sure the surface is as flat as possible is a good start.
"If you are drilling into an irregular surface, cut the feed rate in half, at least until the drill is fully engaged," said Lenz. "That is a good rule of thumb when it comes to drilling into interruptions, cross holes, or uneven surfaces: Reduce the feed rate by 50 per cent, and once you have full engagement, ramp it back up again."
For the most part, with an exchangeable-tip modular type drill up to 5xD, no special spot or flat is required. The drill can enter at full speeds and feeds.
"For example, with typical 4340 steel speeds and feeds, the drill usually can enter around 300 to 350 surface feet, feeding at 0.008 to 0.01 in. IPR, depending on the diameter," said Pilger. "You can certainly drill a hole no problem. Most drills usually have different grades for different materials, and typically they have application-oriented features."
For exchangeable-tip modular drills, flat-bottom inserts offer a lot of application versatility. To achieve that higher quality for holes with longer depths like a 12xD, start with a pilot drill or a spot.
"What that gives us is a starting point to get that longer-length drill started," said Pilger. "We do it with a short version of the drill. There are a couple of rules involved. Most modular insert drills have either a 135- or 140-degree point. We want to make sure that our pilot drill is equal to or greater than the point of the 12xD drill we are working with. For example, if the 12xD drill is a 140-degree point, if we pilot with a 135-degree point, the angles are going to be off and it will hit the corners. That will cause premature failure and wear. Make sure that you are going into a 140-degree point or greater. A flat-bottom drill is 180-degree point, making it an excellent pilot and spotting insert."
A flat-bottom drill is also beneficial for exits, as it breaks out of the material much more evenly and cleanly.
While it depends on the application and the part requirement, an indexable insert drill can provide the best balance of quality and productivity. CERTATIZIT
"When a 140-degree point comes to a concave or convex exit, when it breaks out, it does so unevenly," said Pilger. "It will start wobbling, creating vibration. This can break the carbide or make it wear prematurely. A 180-degree point will break through evenly and maintain position. Uneven breakouts typically raise a larger burr, whereas a flat-bottom drill tends to be a burr-reducing tool."
Flat-bottom drills also are needed for blind holes to get that clean, flat bottom drilled right into place.
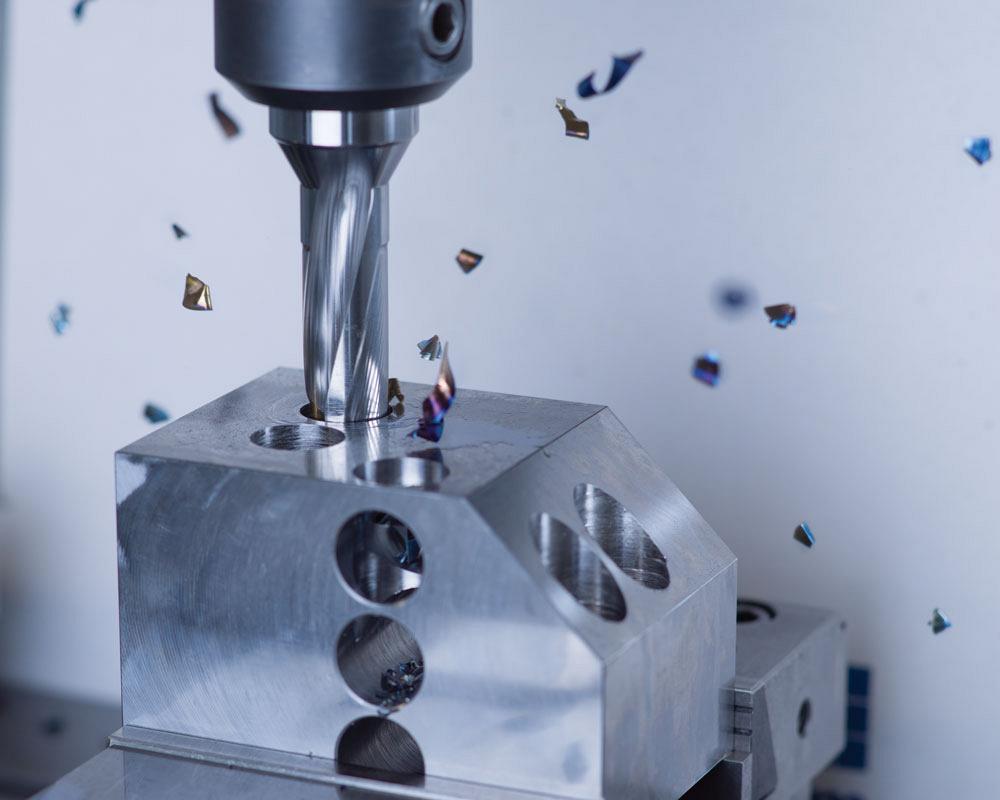
Chip control and evacuation plays a significant role in hole quality.
"Chips should be broken and flowing freely out of the hole," said Maigatter. "This can usually be achieved by adjusting the feed rate, and in the case of an indexable drill, using a proper chipbreaker. The proper chipbreaker will directly affect the formation of the chip and the ability to evacuate it from the hole. Failure to control the chip and evacuate it from the hole will result in a lesser-quality hole and will likely result in damage to the tool as well. If you don’t have proper chip control, you are doomed to fail. Through-tool coolant with sufficient pressure and flow will help evacuate the chips from the hole."
Chips stuck in a hole can score up the surface finish, and in applications where a high surface finish is required, this can be a problem.
"A strong drill will include a helix angle that will be able to help pull chips out of the hole, because you don’t have gravity to help in a vertical application," said Lenz.
"The design of the flutes alone can help chip evacuation and impact surface finish, but it is the coolant that needs to flush the chips out of the flutes."
One mistake that some shops make is using both through-tool coolant and pumping flood coolant down the hole.
"Think about it this way: If you are trying to get the chips out of the hole, why would you pump flood coolant down the hole, which would want to force the chip back into the hole?" said Maigatter.
It’s important to remember that a drill is a roughing tool. There can sometimes be the expectation that operators can do everything required in one shot. With special callouts in straightness and surface finish, secondary operations will be needed to get the precision required.
"If there are additional surface finish requirements or a straightness or a true position, holemaking becomes a multi-step process," said Pilger. "This means adding a semi-finishing and finishing operation after the drilling operation. The process will depend on how tight those tolerances are, but generally speaking, with an exchangeable-tip modular drill, this can be done in two steps."
To hold a true position or straightness, operators must purposely drill a few thousandths of an inch undersize. It is then recommended to use single-point boring.
"A boring bar can remove small amounts of material, size, straighten, and reduce all the peaks and valleys that a roughing drill leaves behind," said Pilger. "With single-point boring we can ensure true position."
A boring operation, while great for straightness and true position, is not the best option for high surface finish quality. Very tight tolerances like a 12 or 15 Ra might be very tough to produce using a boring head. A multi-flute reamer is a better and faster option.
"Part volume will factor into which option is best," said Pilger. "But it’s important to note that a multi-flute reamer will provide a better surface finish, but it won’t straighten the hole; rather, it just follows it. So, it really depends on the hole requirements."
Good shop and machining practices can ensure better-quality holes. It’s so important to ensure that parts are held securely in the machine to prevent any movement during the drilling operation.
"You have to take a different approach when you go after quality holes," said Pilger. "When dealing with a modern CNC machine, you want to make sure you are working with very good fixturing, maybe hydraulic fixturing, and the best types of toolholders for the job."
It’s also important to remember that fixtures and toolholders don’t last forever. They can wear out and lose grip and should be replaced periodically.
Setup can make or break holemaking operations, especially those with strict quality requirements. Not clamping a part correctly can cause movement during the process.
"The one good thing with a drill is that all the pressure and load are up the centre of the spindle," said Lenz. "Because the forces come up through the centre of the spindle, or axial forces, it doesn’t experience that radial load. You don’t have the side loads like with an end mill. You have just vertical loads, so that helps."
Another important factor that affects hole quality is spindle runout. Shops can check runout with a simple indicator and holder.
"Let’s say we find 0.0005-in. runout in the spindle," said Pilger. "That may sound good, but it gets doubled when you are creating a hole, which means that it is going to be 0.001-in. runout in the hole being produced. That can kill you right off the bat. Understanding runout and [knowing] the machine capabilities are important steps to ensuring that you can in fact meet the tight tolerances and hole quality requirements."
Associate Editor Lindsay Luminoso can be reached at lluminoso@canadianmetalworking.com.
CERATIZIT, cuttingtools.ceratizit.com
Seco Tools, www.secotools.com
YG-1, www.yg1.ca


Keep up to date with the latest news, events, and technology for all things metal from our pair of monthly magazines written specifically for Canadian manufacturers!
Start Your Free Subscription
Easily access valuable industry resources now with full access to the digital edition of Canadian Metalworking.

Easily access valuable industry resources now with full access to the digital edition of Canadian Fabricating & Welding.