- FMA
- The Fabricator
- FABTECH
- Canadian Metalworking
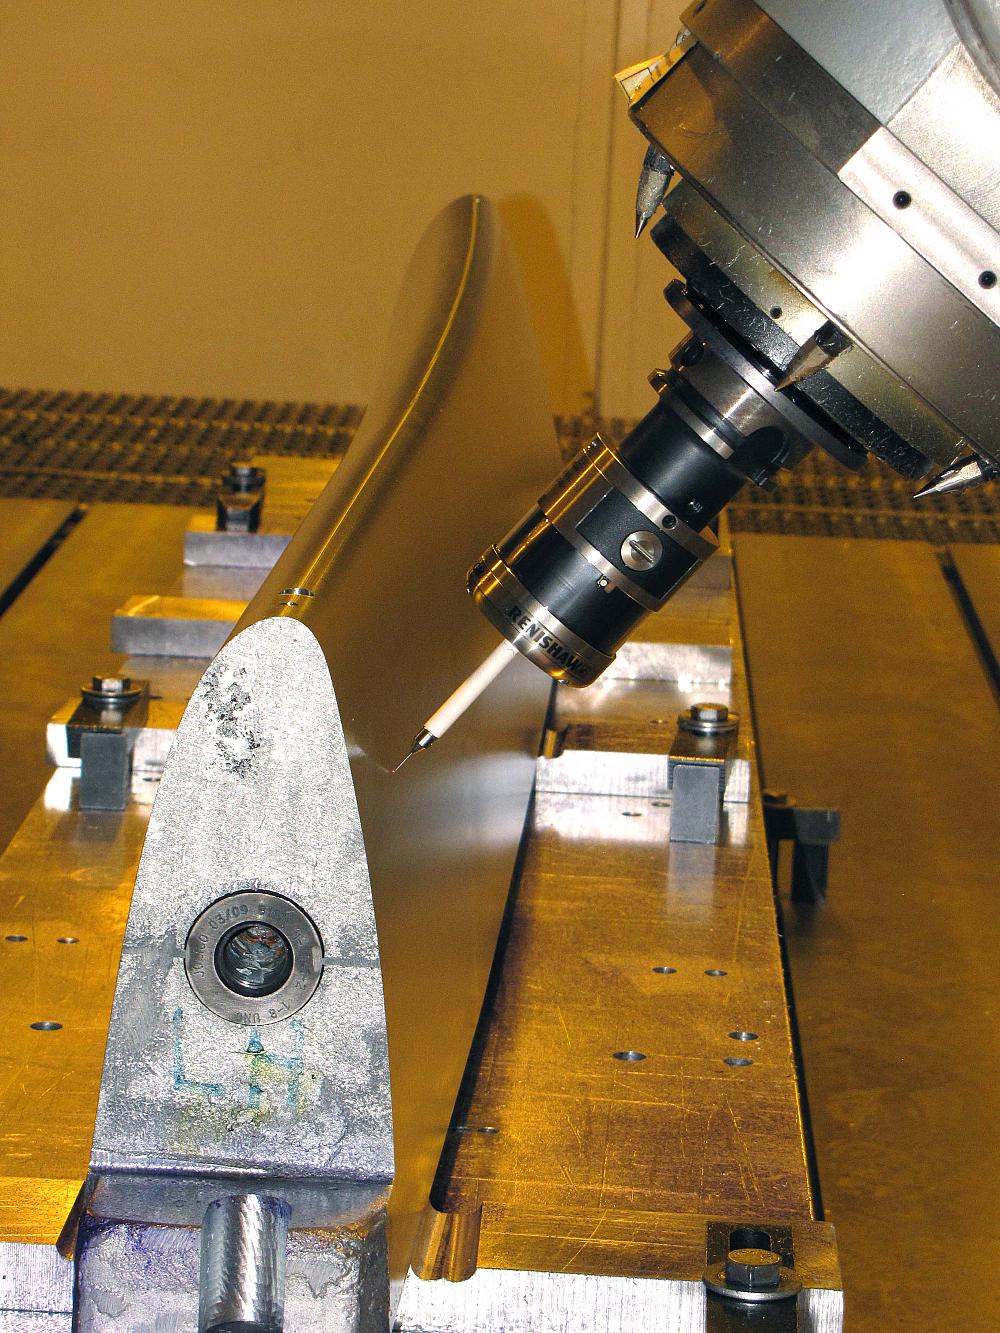
Probing questions
Canadian Metalworking talks with Renishaw Canada Director Dafydd Williams to find out more about adding probes to existing tooling.
- By Jim Anderton
- March 18, 2014
- Article
- Metalworking
With multiple turning and milling axes plus in machine tool handling capability with dozens of tools available, it’s no surprise that the next frontier in high productivity milling and turning is full system automation. Pallet changers and pick-and-place robotics are becoming commonplace in automated manufacturing cells, but in many operations the process must be stopped for dimensional checks.
Even here, the process is changing, as multi-axis capability and big tool cassettes allow advanced users to take critical quality functions into the working envelope. Can you simply add a probe to existing tooling?
It’s not quite that simple, and Canadian Metalworking sat down with Renishaw Canada Limited Director and General Manager Dafydd Williams to find out more:
Canadian Metalworking: In any measuring process a safe assumption is that instruments and fixtures should be more precise than the attribute being measured, sometimes an order of magnitude more precise. Can a spindle mounted probe in a modern five-axis machine offer that kind of repeatability?
Dafydd Williams: “There’s not a single answer to that question, unfortunately. The key is repeatability; you absolutely need repeatability in any measurement system. When we look at any machine tool we focus on repeatability of that tool, because we know what the probe’s “overhead” is. We ball bar test machines to benchmark them and understand what their performance is. Then we calibrate using an artifact, in the environment in which it will be probing.”
CMW: Historically fixture-based gaging began with a surface plate or ‘tombstone’ to provide a zero datum reference point for measuring. Can a machine tool provide a consistent reference plane or point from which to measure?
DW: "The way Renishaw uses probing in our own manufacturing system is fundamentally to use the probe for process control. It can be used for job set up, or inspection of the finished work cut job, but the real power of the probe is in controlling the process. That’s where the real value is. In order to do that on a machine where you’re cutting on the same structure on which you’re measuring, you have to verify that in process. If you get bogged down in the complexity, it sounds and feels like
a difficult thing to do. In reality it’s not; it’s very simple.
If you probe a simple shape that’s similar in size and shape to the feature you’re cutting, with the unknown feature measured perhaps on a coordinate measuring machine, you can very quickly ascertain the performance
of the machine tool in measuring that feature. It’s a generic artifact.
At the Renishaw production process, the artifact lives inside the machine tool, which is geometrically representative of the part that you’re cutting and is made from the same material. If you’re cutting aluminum alloy, the artifact will be made from the same alloy. It lives in the same environment as the parts to be cut, at the same temperature, in the same coolant. Now when we probe we can expect a good result and if we don’t get that result, we know we have a problem with the machine tool.
We can also probe during the cut to update temperature offsets. Now we’ve gone from an open ended process where we assume accuracy, cut the part, take it out of the machine and measure it, hoping that nothing in that long cutting chain went wrong, into what I call a deterministic process for that part. And that’s the key; we’re using the probe to understand what’s going on right now.
So, from a tool path perspective, you can determine if a specific attribute or programmed toolpath is the problem part way through the cutting process. For example, let’s say the machine cuts a hole that’s undersized. Why? Temperature. We compared it with artifact, but the artifact is undersized as well. It’s actually a good hole..at the right temperature the part will be the right size.”
CMW: How often does the probe touch the work piece and the artifact?
DW: "That’s a very good question. That’s really down to understanding the variability, capturing the variability in your process. If you look at our process, which is well documented online, you’ll see that we control and probe the artifact during set up and also control and probe the artifact during machine warm-up, which is also a critical time, but once we cut the first part and the first part is on size, then we machine the rest.
During the process however, we check the variables. We check the tool sizes and we check that the tools are there, and aren’t broken. Those things need to be there, so we use either a laser or touch probe to check tool length and diameter. Tool wear of course is a factor. Those are simple updates that can be made in process.”
CMW: What about cycle time? When you’re probing the part in the machine, you are adding to machine cycle time. Is it a given that you’re saving time measuring the part in process versus the conventional way?
DW: My answer to that question would be, ‘define cycle time.’ Metal that comes in at one end of my factory and goes out the other end 24 hours later, is not my definition of cycle time. Cycle time is not how long it takes to make a part, it’s how long it takes to make a good part. If you are busy machining scrap, what’s your cycle time? Once you can appreciate that, I think the argument changes quite quickly.
CMW: Of course the larger the volume of parts produced with fewer stoppages, shortens the effective cycle time. It looks like it’s between the additional machine time to probe, versus the time saved by fewer reject parts.
DW: "There are different approaches to know what you’re doing, depending on your process. It’s typically volume driven. For example, for a very high-volume automotive part, there won’t be a lot of in cycle process control going on. In that case you have a process that’s been heavily pre-engineered with all the process variables already captured and in control. That’s not a practical solution for a thousand-piece run however, especially if you’re making 1000 different pieces. Is in cycle probing the panacea? It’s a valuable tool for a lot of applications.”
CMW: Is this sellable capability? Can shops use in machine probing as tool to win new business?
DW: "Absolutely. Ultimately reducing scrap, reducing cycle time and improving efficiency means profitability … and increased efficiency means increase competitiveness.”
About the Author
subscribe now


Keep up to date with the latest news, events, and technology for all things metal from our pair of monthly magazines written specifically for Canadian manufacturers!
Start Your Free Subscription- Industry Events
MME Saskatoon
- May 28, 2024
- Saskatoon, SK Canada
CME's Health & Safety Symposium for Manufacturers
- May 29, 2024
- Mississauga, ON Canada
DiPaolo Machine Tools Open House 2024
- June 4 - 5, 2024
- Mississauga, ON Canada
FABTECH Canada
- June 11 - 13, 2024
- Toronto, ON Canada
Zoller Open House & Technology Days 2024
- June 12 - 13, 2024
- Ann Arbor, MI


