- FMA
- The Fabricator
- FABTECH
- Canadian Metalworking
The right measure
- March 31, 2009
- News Release
- Measurement
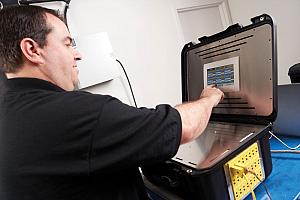
Coordinate Measuring Machines (CMMs) are an important part of quality inspection. Most manufacturing facilities rely on data acquisition from coordinate measuring devices. With this in mind, reducing down time for this type of equipment is critical.
There are many things we can do as CMM owners and/or operators to minimize downtime and increase the longevity of our machines. A good start is to have the machine located in a clean environment. An ideal environment would involve an enclosed room that does not have dust, oil or other contaminants floating in the air. The air supplied to the CMM must be clean and dry. It is important that the air compressors being used are accompanied with a good filtration system. Air quality and a temperature-controlled environment is important. If this is not possible, then it is important to clean and perform general maintenance on a daily basis. Many problems arise from machines not being properly cleaned and maintained.
Most manufacturers of CMMs design the machines to ride on air pads. A common issue is the microscopic holes in the air pads getting clogged with dirt or debris, which causes the machine to either not move or reduce the free floating movement. Trying to use the machine in this state may cause a scratch or gouge in the surface plate, which requires expensive and time consuming lapping of the surface. This problem may also create an issue with machine squareness, reducing the overall accuracy of the machine. Daily inspection and cleaning of the bearing guideways can reduce or eliminate this problem.
Another environmentally related problem is machine errors when trying to move in a particular axis. This is often caused by an encoder losing its scale’s signal on the axis due to a dirty scale. Therefore it is important to know where the linear encoders are located and how to clean them. If the scale has been cleaned and this error still occurs, the detector head (encoder) may also require cleaning or re-alignment to the scale.
Stylus false triggers are another common issue associated with machine downtime or inaccurate results. There are many factors that could affect the probing system. First thing to check is if the stylus is loose. This can be corrected by using the small wrench from your stylus tool kit to simply tighten the tip. Though the stylus should not be extremely tight, it is important that it is threaded into the touch trigger system or module with moderate force to make it snug. Another thing that can cause this issue is stylus length. Most trigger systems have specified lengths that the configuration should not exceed. Having a stylus configuration that’s too long or too heavy will cause excessive force on the trigger system, thus causing the stylus to ‘air’ trigger. Confirming the stylus length/mass with the manufacturer’s specifications can easily rectify this problem.
Inaccurate readings from the machine are also time-consuming for operators to troubleshoot. Ensuring the stylus being used is not loose and has been properly calibrated is the first step. Start by finding the probe list and checking both the calibrated diameter of the stylus and when it was last calibrated. If the calibrated diameter does not correlate with the actual diameter, then this is a reason for measurement problems. Re-calibrate the stylus and verify the calibrated size. If there is still an error with the calibrated diameter, check the calibration parameters, the condition of the stylus and condition of the calibrated masterball. If there is dirt, debris or chips on either then correct this issue before continuing.
Basic care and maintenance is important in ensuring accurate measurements and good machine performance.
nderstanding what problems can occur and how to overcome them will save costly downtime in the future.
subscribe now


Keep up to date with the latest news, events, and technology for all things metal from our pair of monthly magazines written specifically for Canadian manufacturers!
Start Your Free Subscription- Trending Articles
Automating additive manufacturing

CTMA launches another round of Career-Ready program

Collet chuck provides accuracy in small diameter cutting

Sandvik Coromant hosts workforce development event empowering young women in manufacturing

GF Machining Solutions names managing director and head of market region North and Central Americas

- Industry Events
MME Winnipeg
- April 30, 2024
- Winnipeg, ON Canada
CTMA Economic Uncertainty: Helping You Navigate Windsor Seminar
- April 30, 2024
- Windsor, ON Canada
CTMA Economic Uncertainty: Helping You Navigate Kitchener Seminar
- May 2, 2024
- Kitchener, ON Canada
Automate 2024
- May 6 - 9, 2024
- Chicago, IL
ANCA Open House
- May 7 - 8, 2024
- Wixom, MI


